
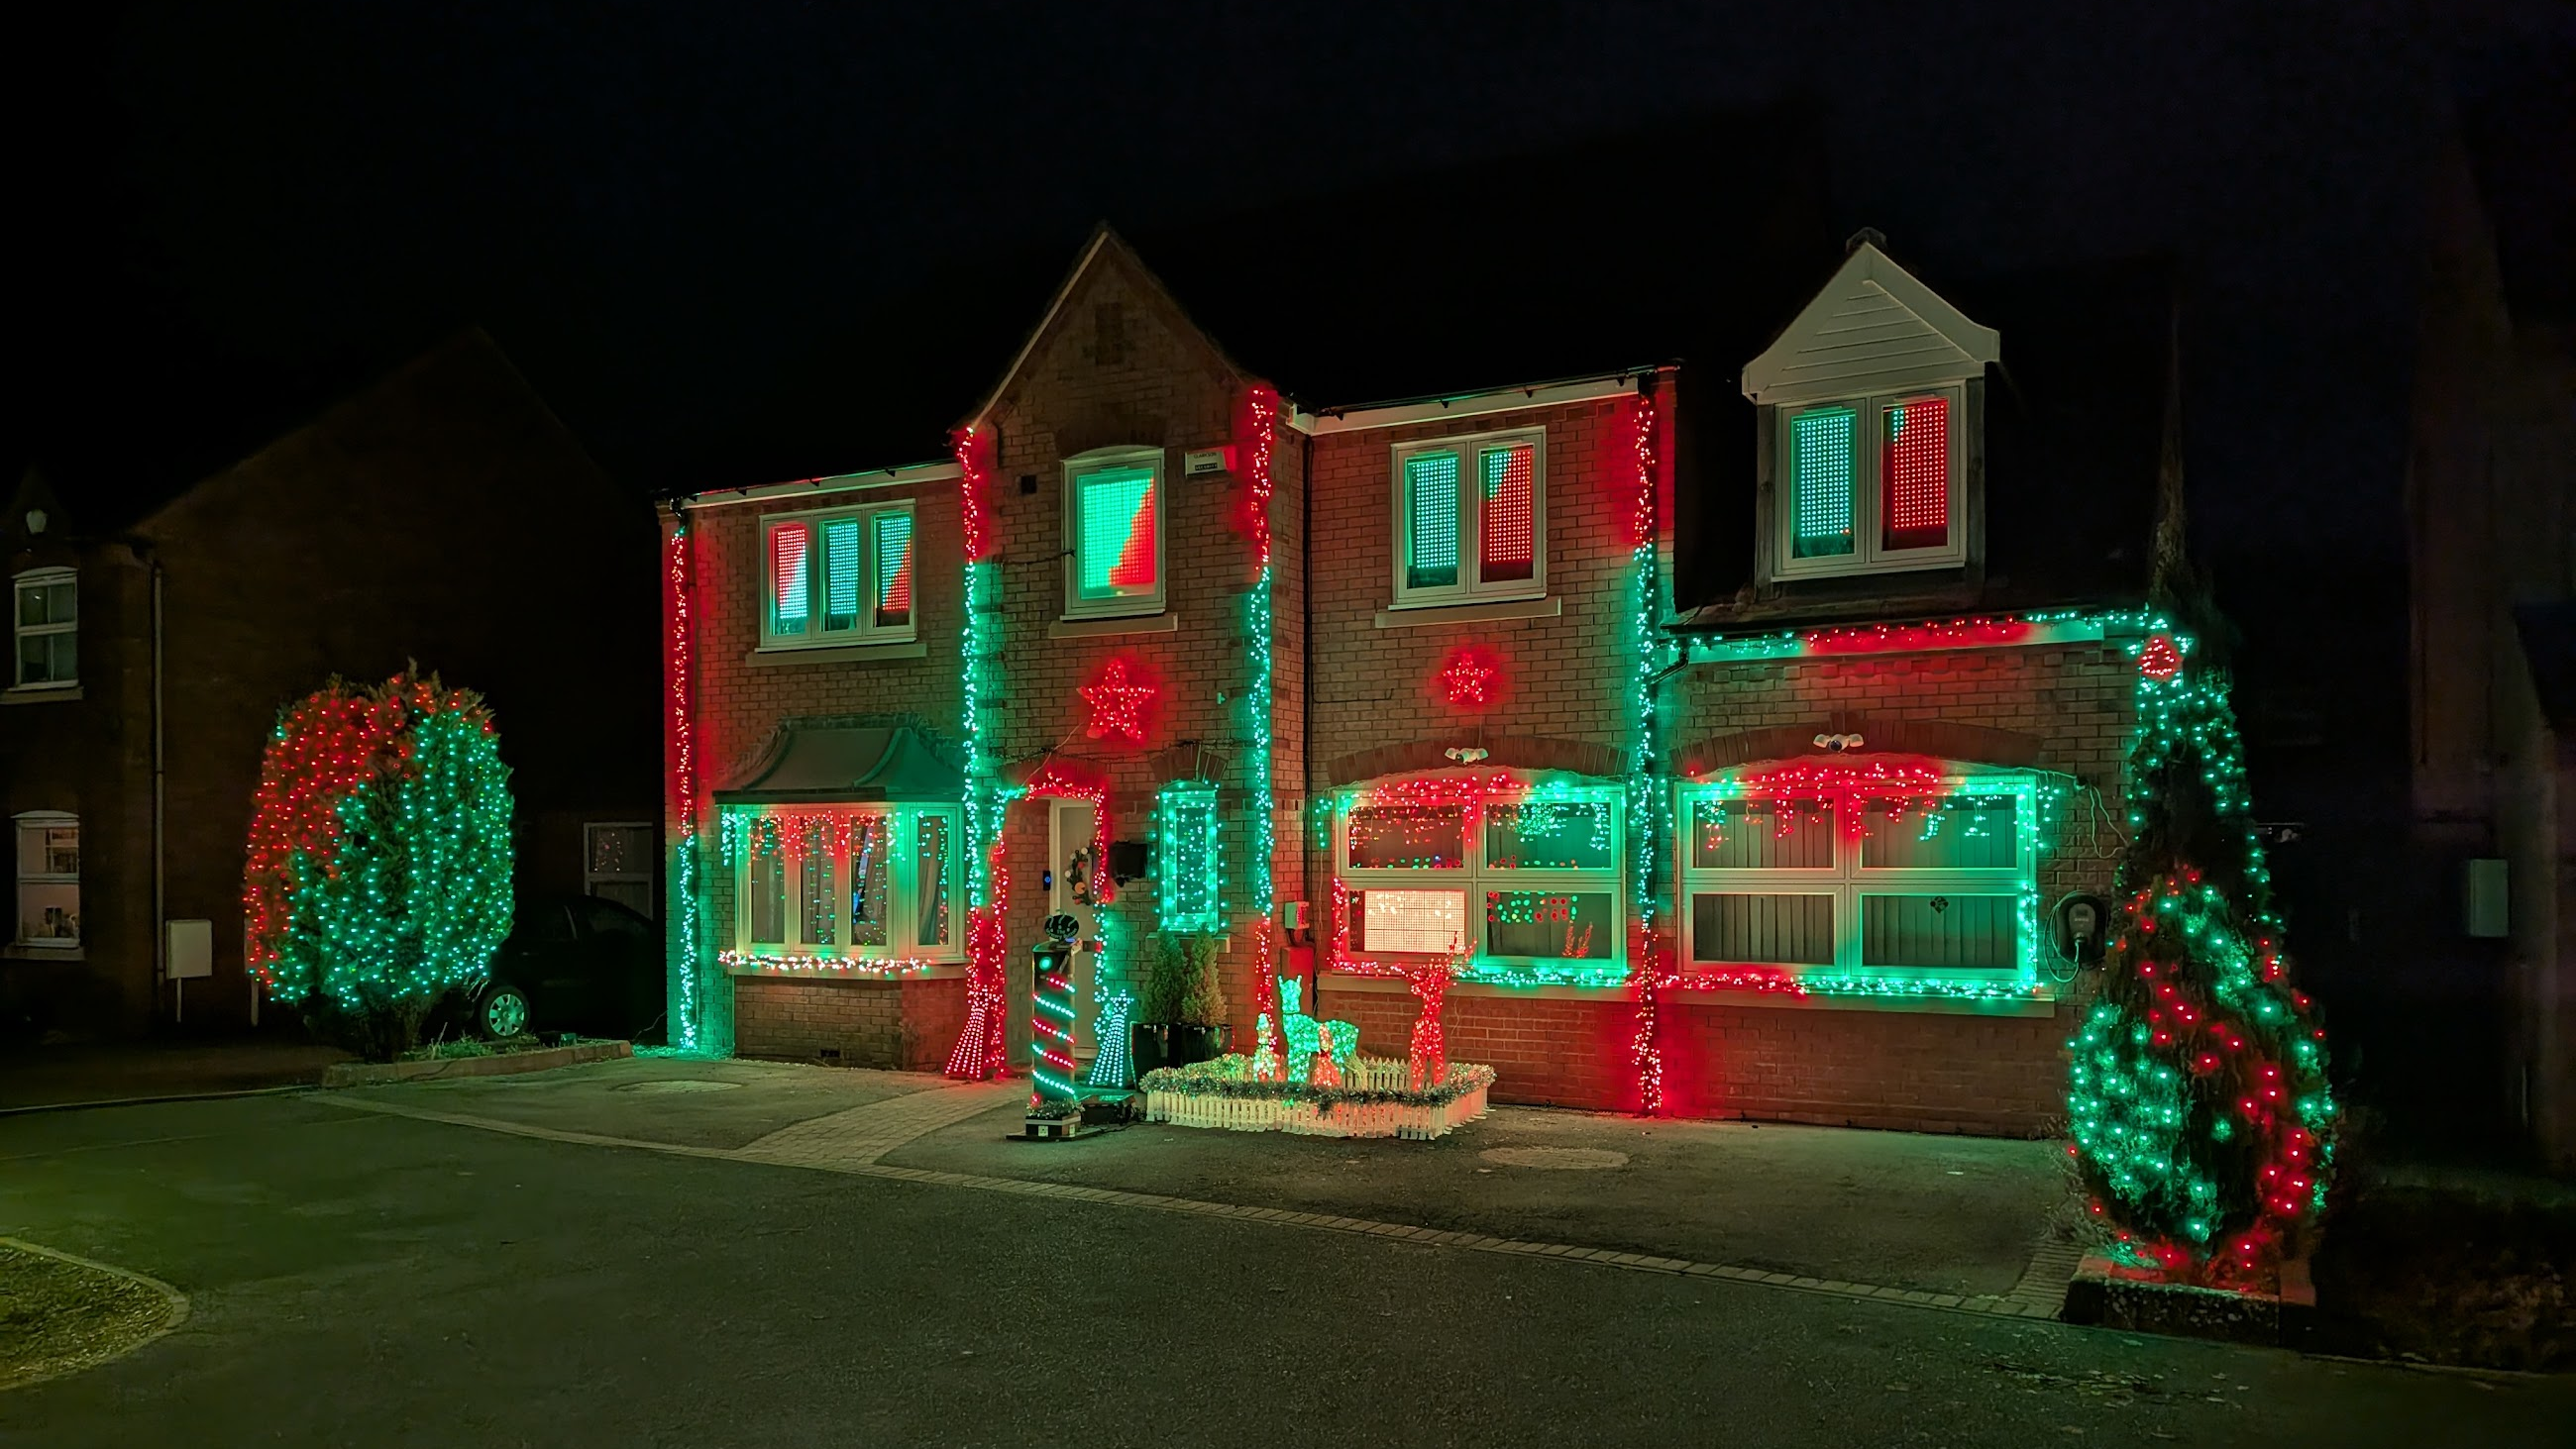
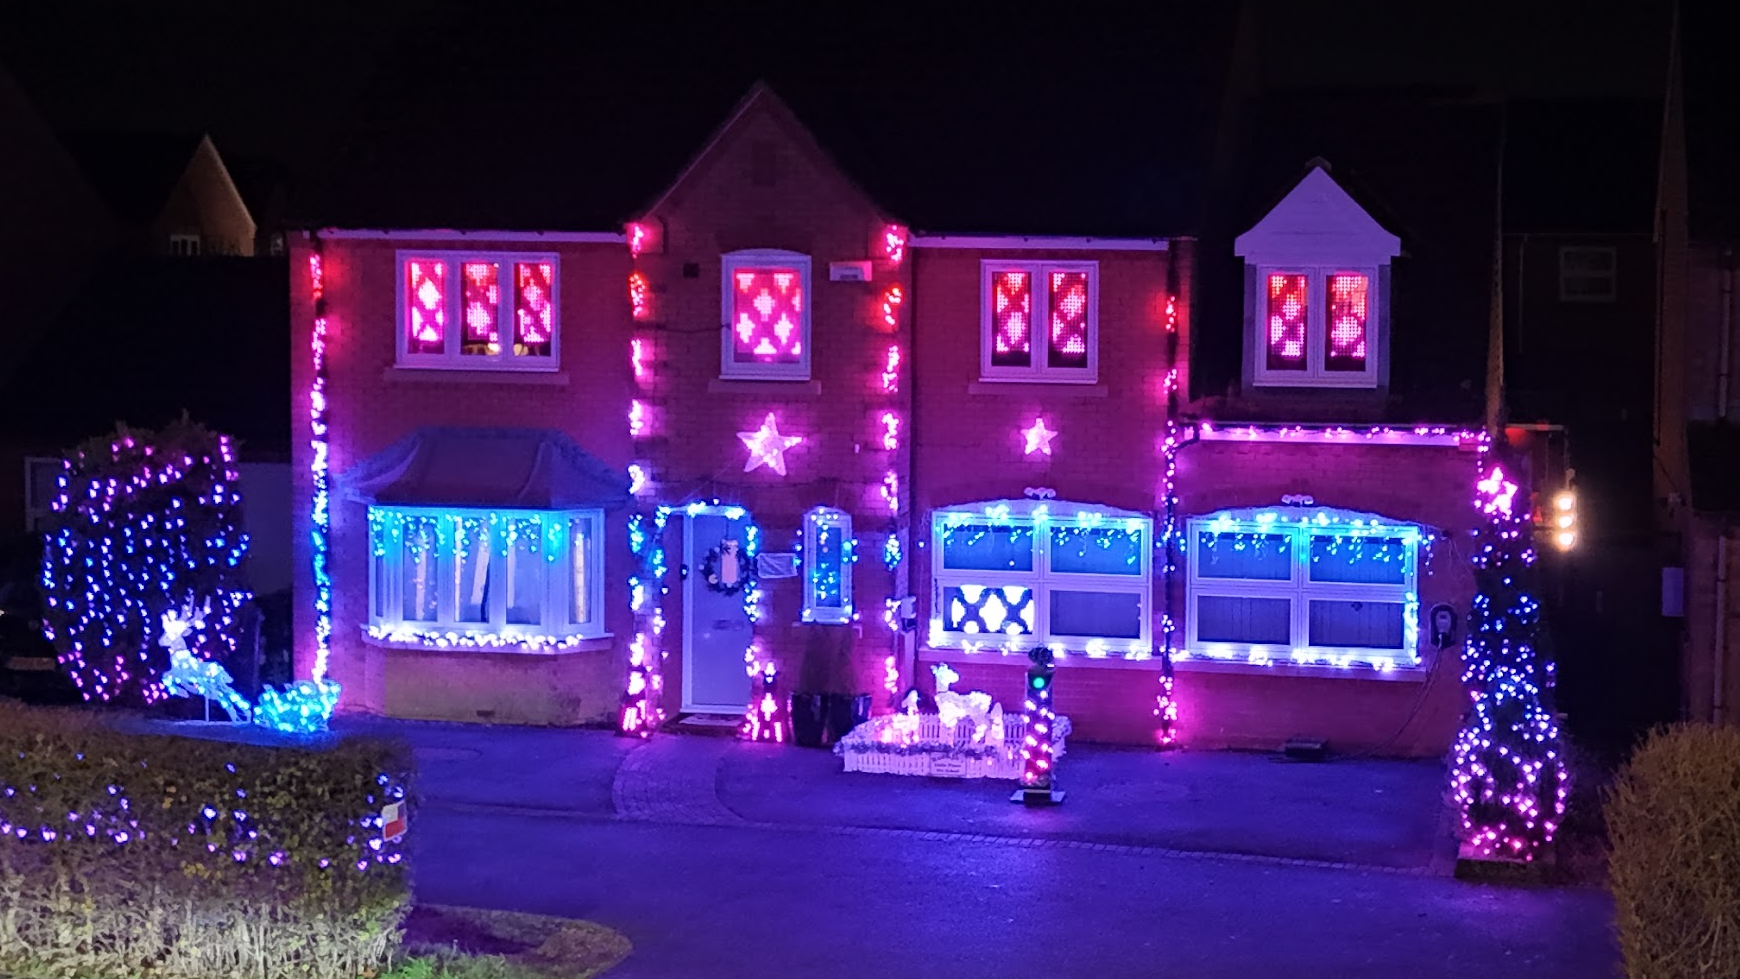
2024 is the third year of our Christmas Lights, and another year of upgrades & improvements. We started out with 3040 LEDs in year one, increased to 6618 LEDs in year two, and this year we expanded to 10691 LEDs! With new props, upgrades on some of last year’s features, and added interactivity, this year has been a big step up in eye-dazzle and behind-the-scenes planning.

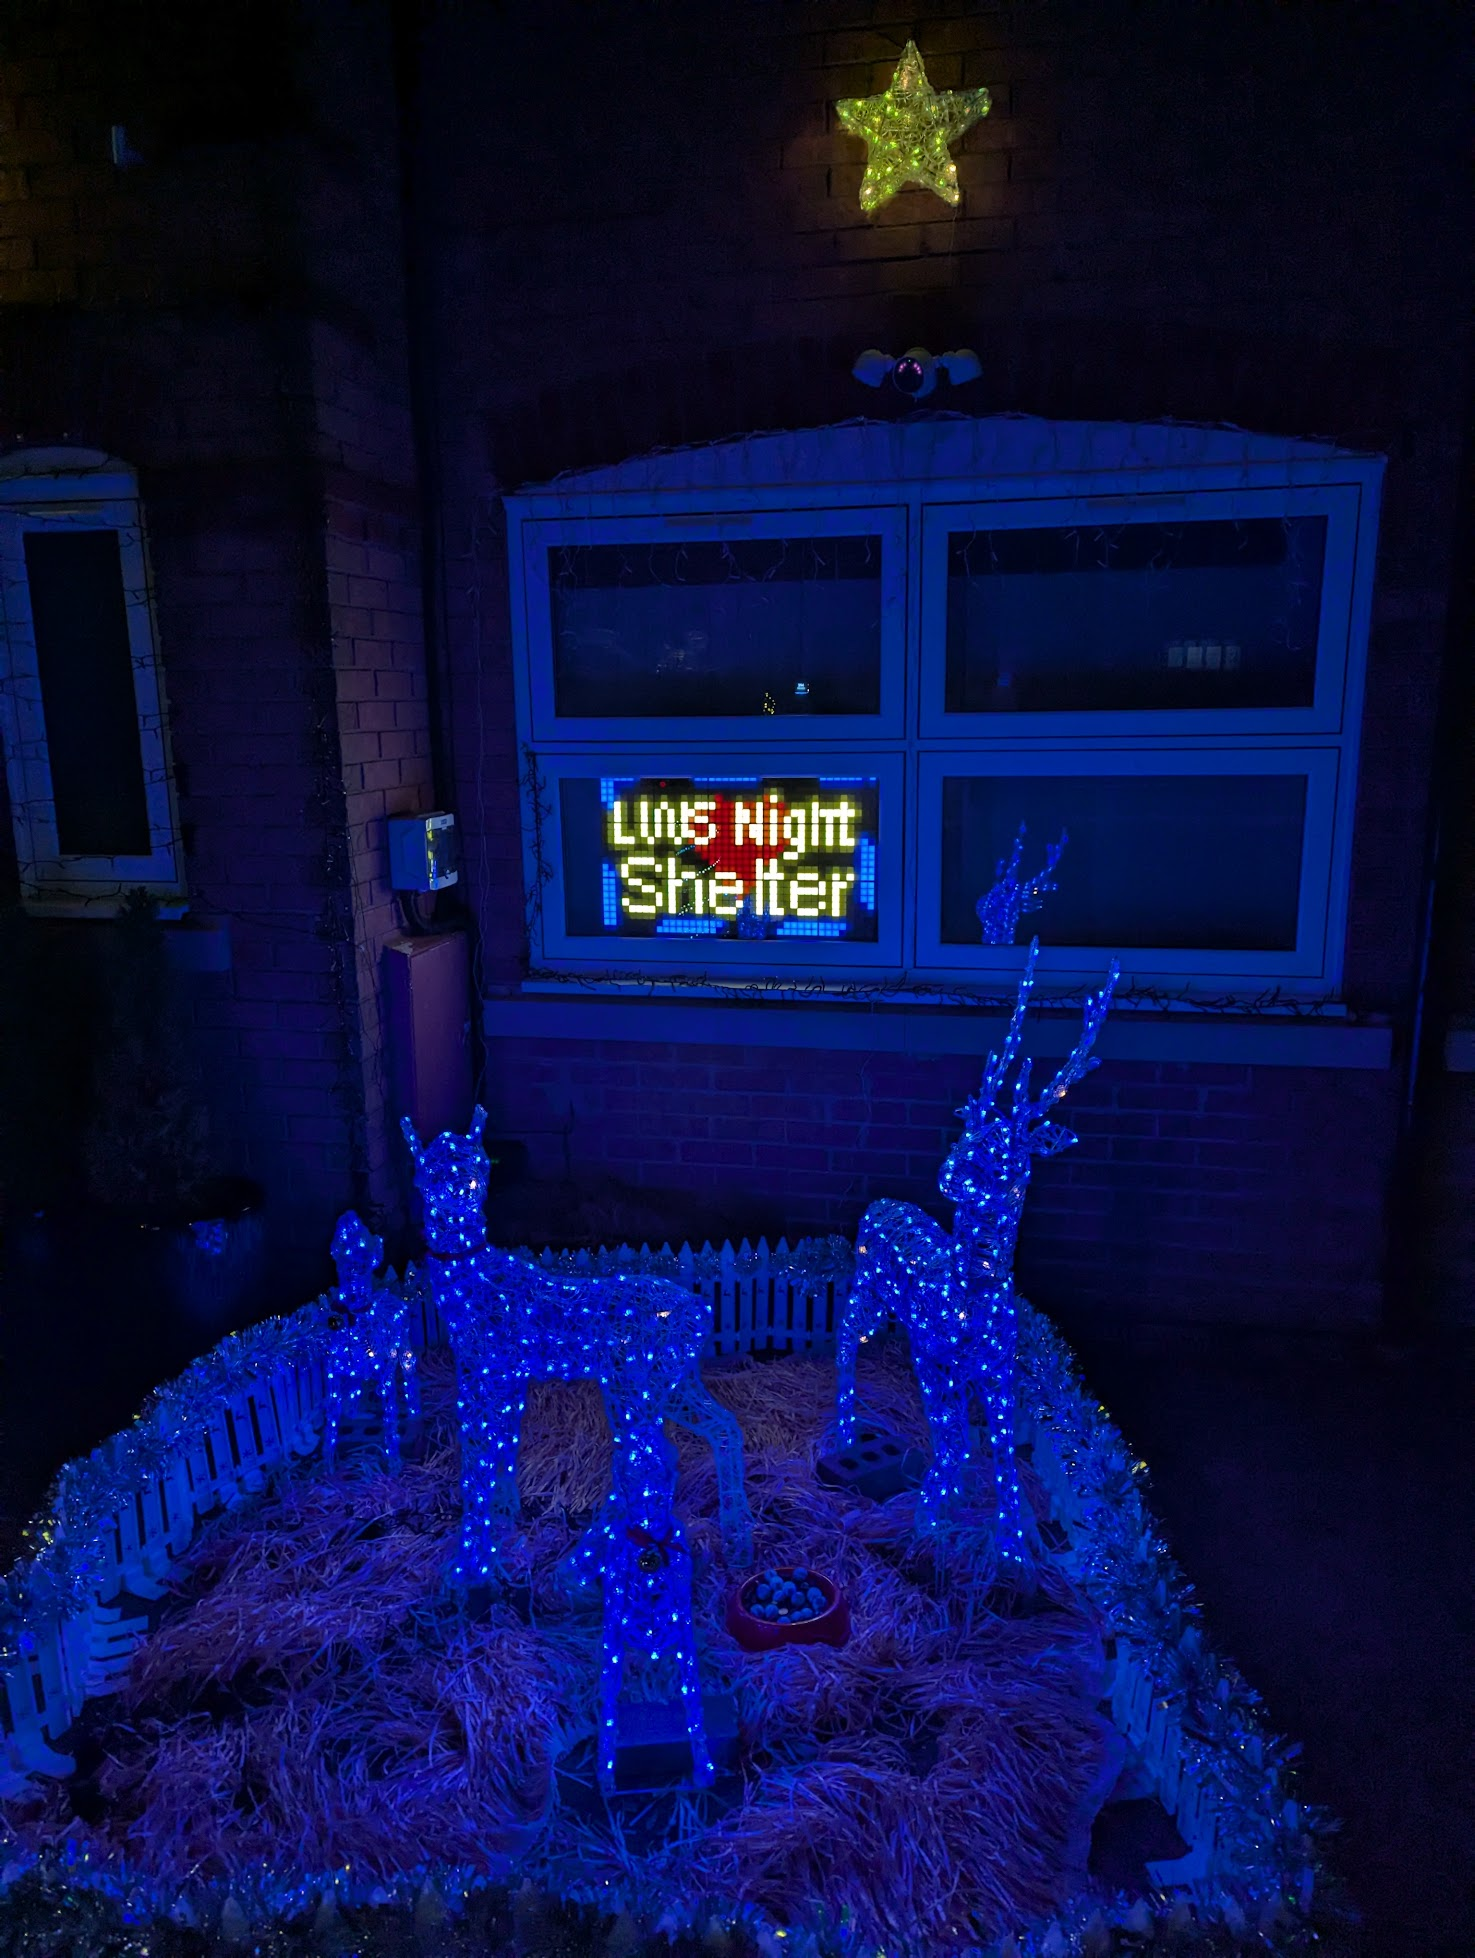
This year we are proud to be supporting LWS Night Shelter again; a local charity who provide food, shelter & company to the homeless and vulnerable members of our community. As of writing, we’ve raised an incredible £815 – more than doubling last year’s fund-raising of £315. A big thank you to everyone that’s donated either via JustGiving or the contactless donation station – more on that in a minute!
The Plan
Before the 2023 display was down, we were already thinking about 2024. I knew that I wanted to do something a bit different, and add an interactive element to the display. There were two goals that I knew any idea would have to hit:
- The logic had to be simple. I wanted it to be accessible to everyone, young and old. This also means using it has to be intuitive, with zero learning curve.
- It had to be technically simple. Right now, it’s tricky to do dynamic lights with FPP and xLights (see 2023’s post for more details) – all sequences have to be created in advance and rendered offline; this means you can’t eg make a game with objects that move around, like pong, Flappy Bird etc.
Eventually I settled on the idea of doing a random surprise, inspired by a fruit machine, or the item box in Mario Kart – the viewer presses a button, which triggers a carousel of Christmassy options to roll around for a few seconds, and then one is picked at random, to trigger a ~15 second themed sequence before returning back to the regular show.
For the sequences to be fun, they would have to be recognisable and this would mean accurate graphics. While the 2023 display is mostly abstract patterns, there were some graphical elements drawn on the upstairs windows (a moon, stars, tropical fruit, classic game characters), but the type of lights we used meant they were a bit fuzzy and inconsistent. That would have to be fixed for 2024 for this idea to work really well.
The trigger button would have to be placed outside – somewhere that was really obvious, and lit. The best place for this was on the drive, and understandably, people feel a bit nervous entering the driveway and approaching, so it really had to scream “it’s okay to come and press me”. It would need to be mounted on something substantial, that could also house related electronics.
Last year was the first year we asked for donations, which we did through two methods – a poster with a QR code to JustGiving in a downstairs window, and adding a link to posts in local Facebook groups. The posts worked really well – thank you everyone that donated that way, but the downside was they were restricted to Facebook users. The poster was pretty ineffective – you had to walk right up to the house to see it, and in the dark it was basically invisible; I think we had two donations this way. The QR code and JustGiving add friction (but come with Gift Aid support), and it’s difficult to thank people that donate this way, especially as the JustGiving API doesn’t have a real-time notification facility. What I really wanted, was a fixed-price contactless pay point (like the ones you see in some museums), as it makes it so easy for someone to just tap a card or their phone, and bonus points if it supported payment notifications, which could then trigger a “Thank You” display sequence.
So on top of the normal work of putting everything out, mapping it and producing sequences, the new work for 2024 would involve:
- Finding a new way of mounting lights in the windows
- Designing and building a prop to hold the button
- Creating a bunch of surprise sequences
- Find a new payment method
- Write display logic for the button and payment notifications
- Other upgrades to the general display (extra lights, swapping some existing things out etc)
So, the day after we got back from our Summer holiday, the work began…
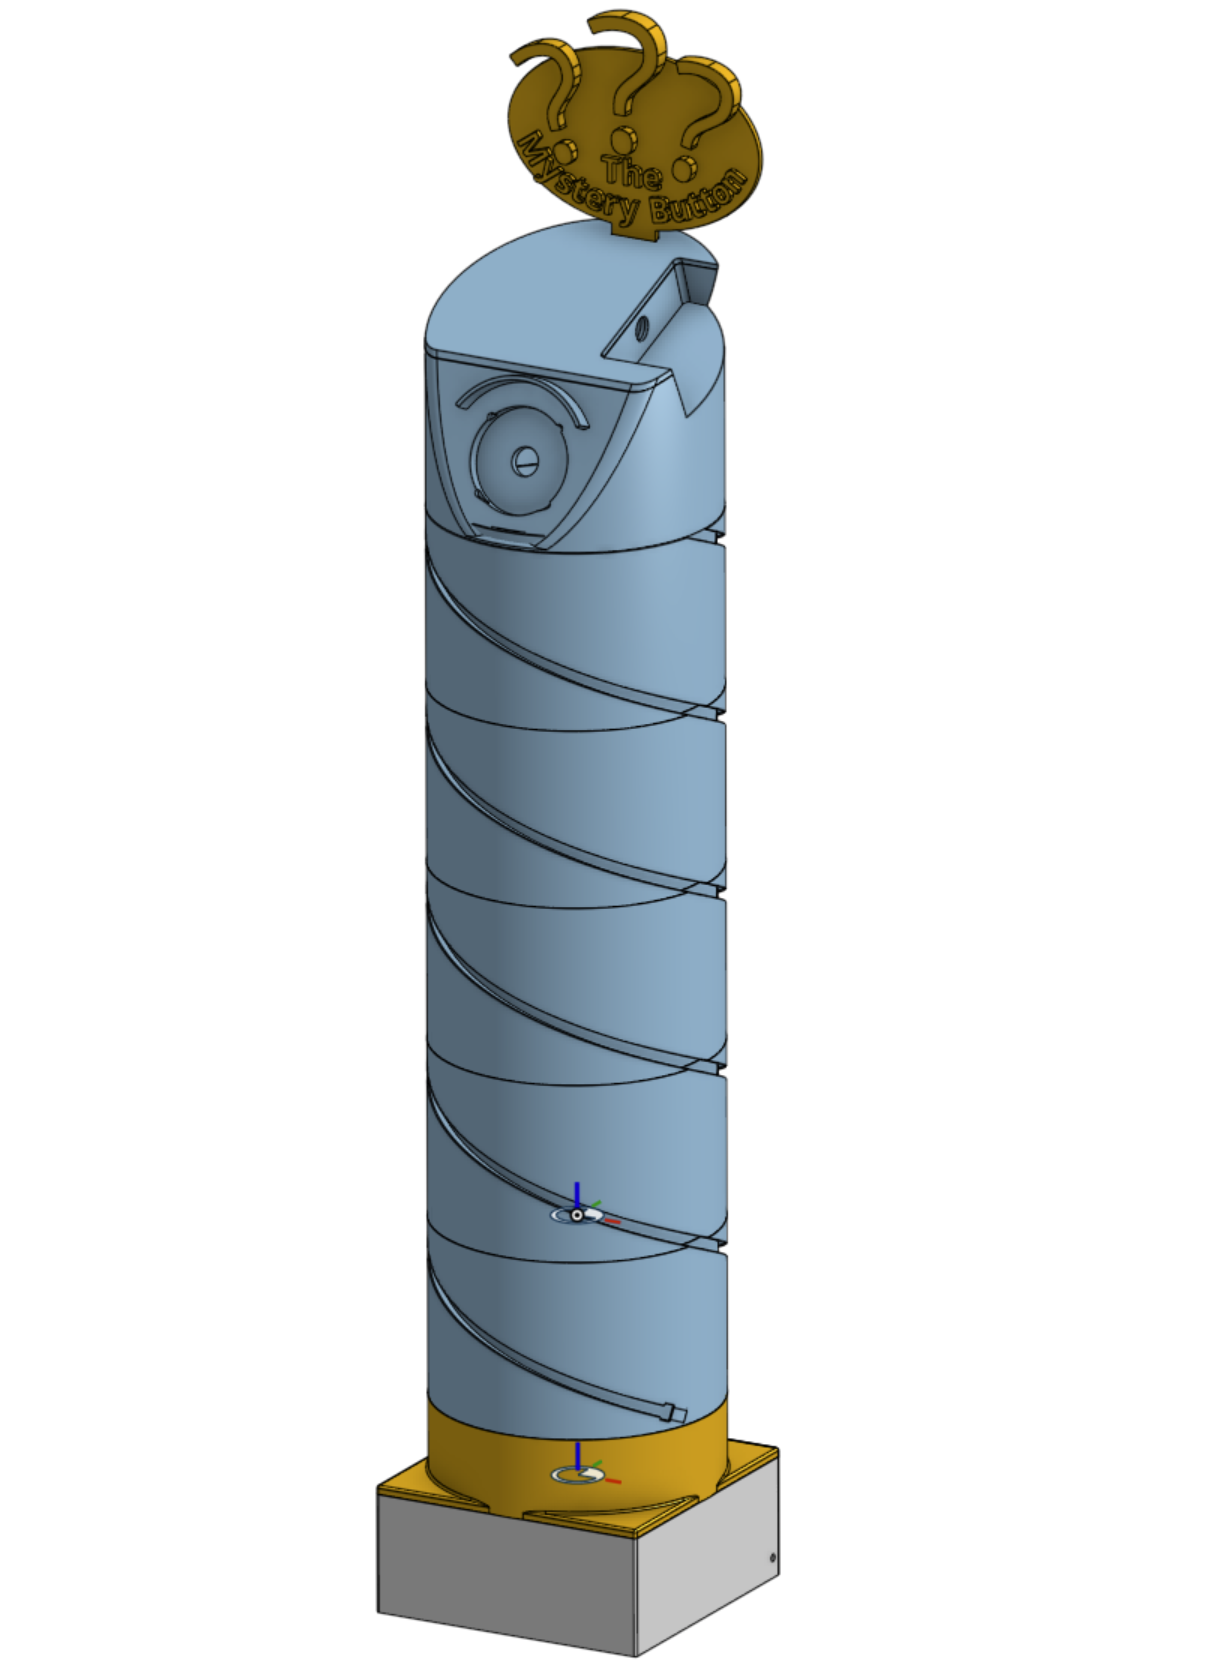
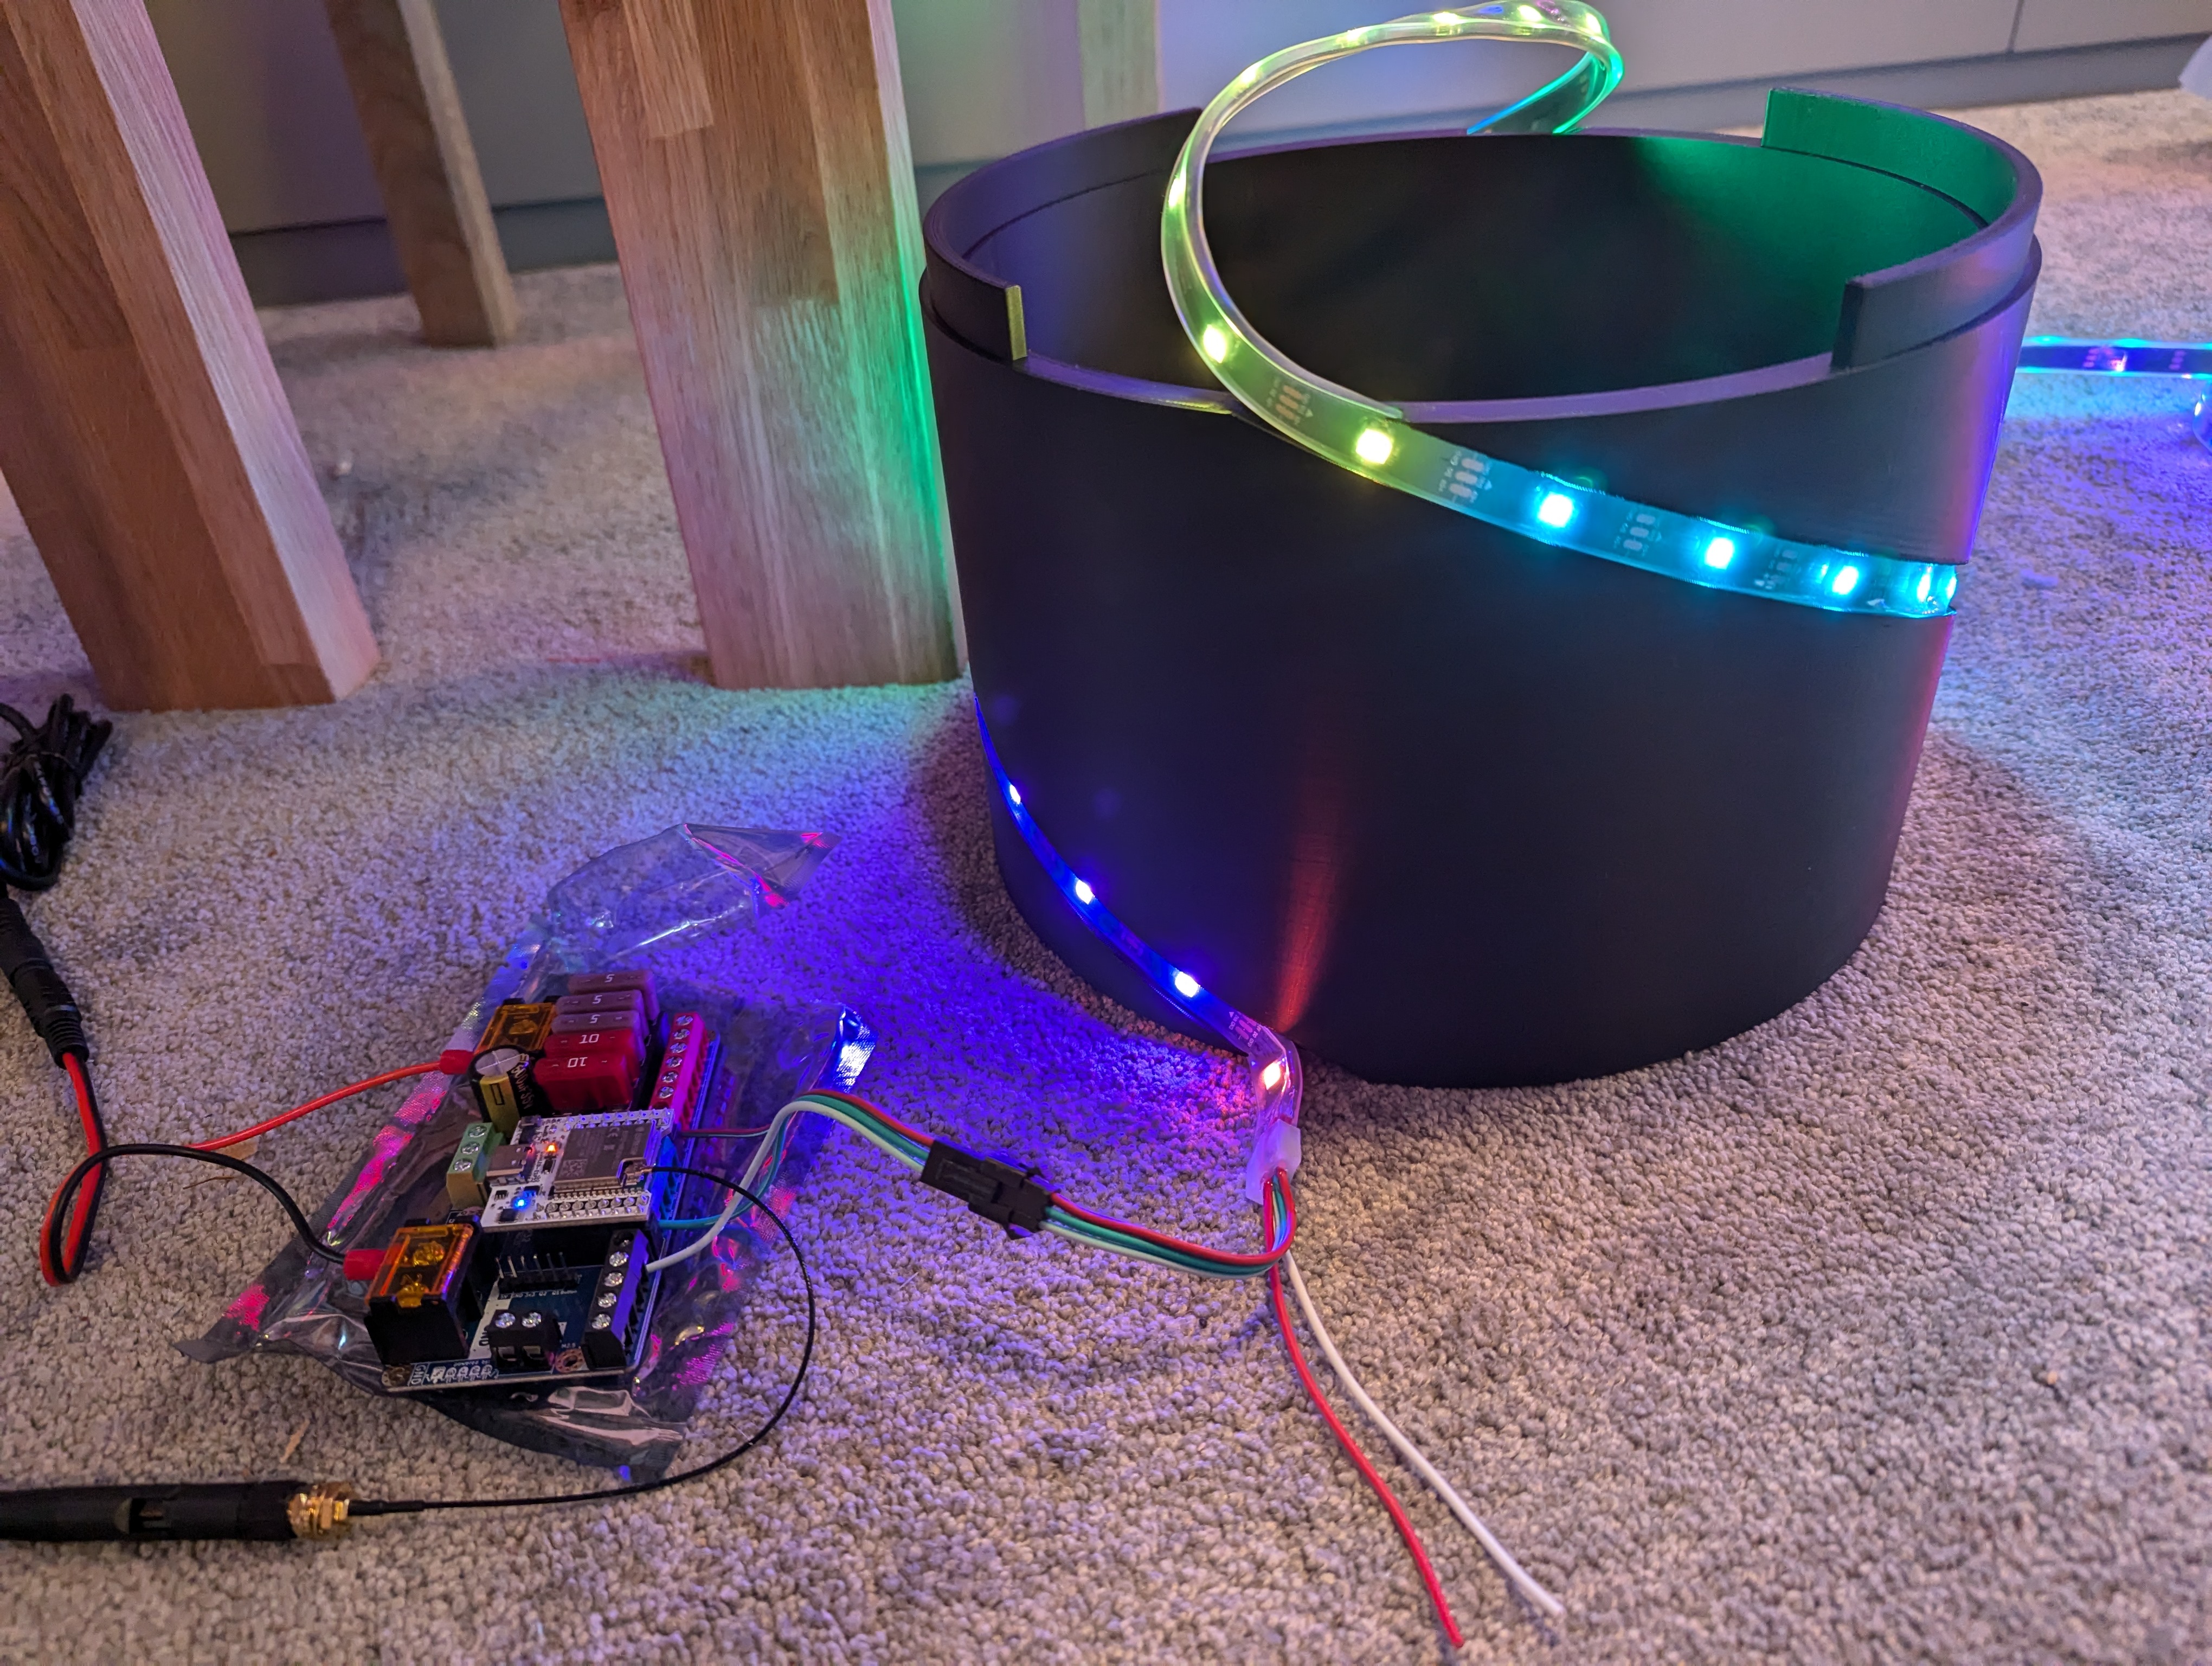
The Button Pole
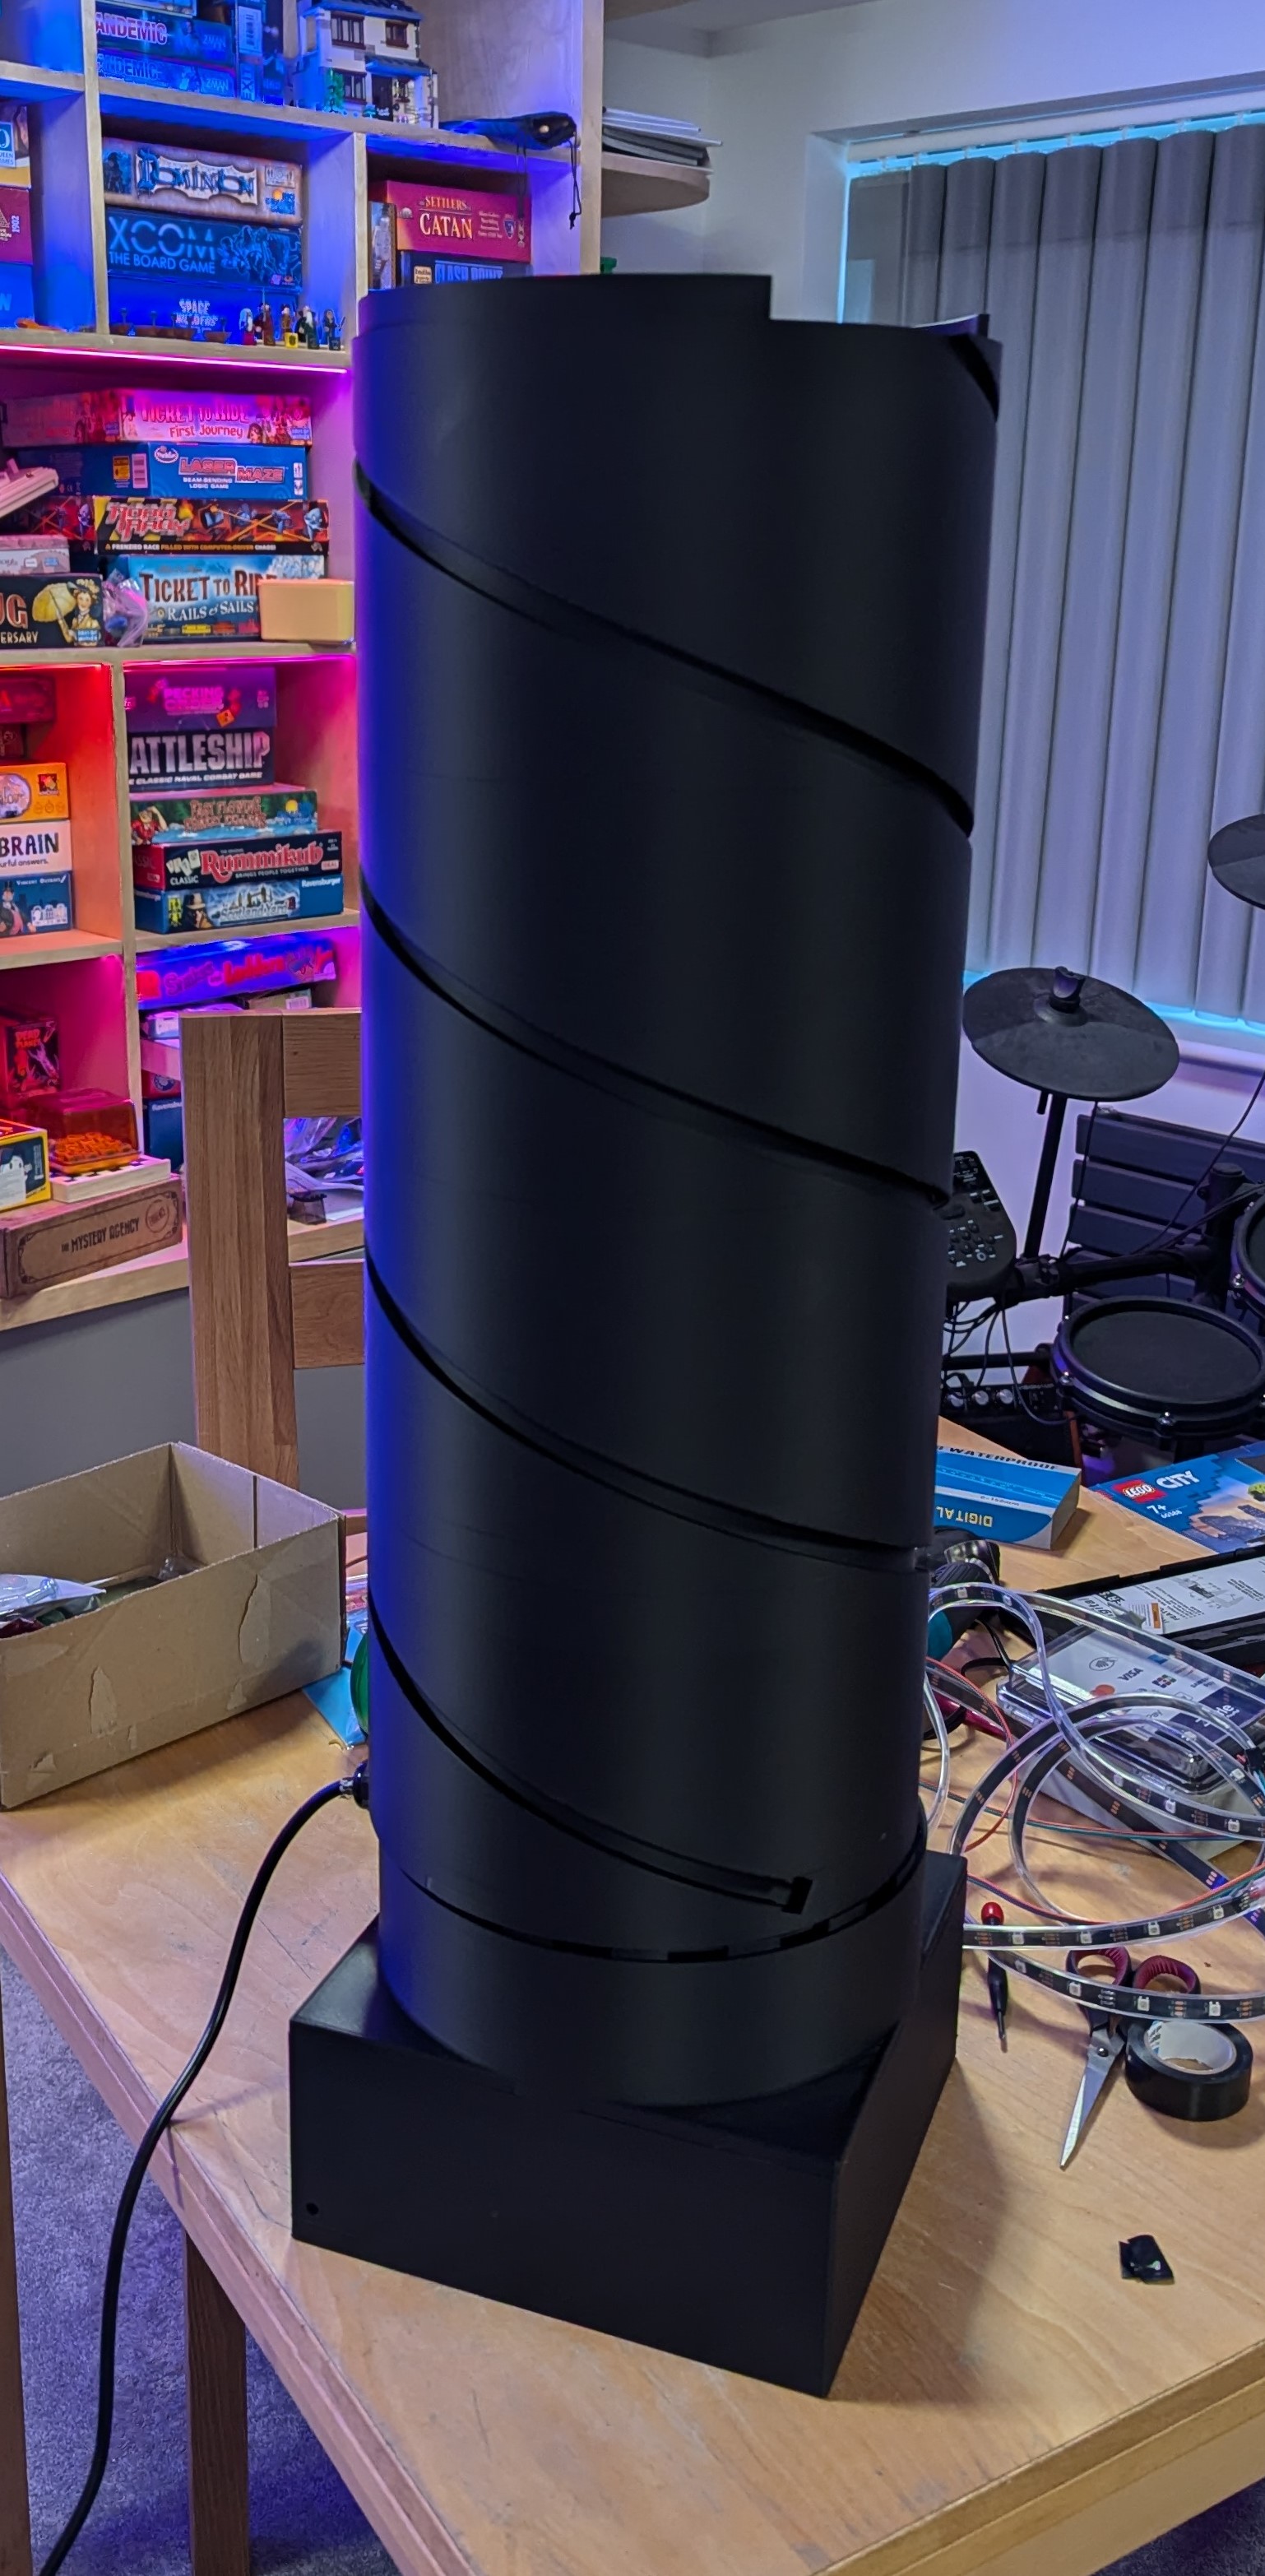
I designed a tall pole on which the button could sit, along with the card machine. As big as my 3D printer could fit, and split into sections that could slot together, this is the biggest thing I’ve printed yet. Standing at 1.3m tall, it took around 96 hours to print. Two 2m strips of waterproof LEDs spiral around it, meeting at the top before wiring descends into the base. The core is glued together, but the top and base are modular to provide access for maintenance, and with the intention that I could replace the top to eg have a different button layout. The base houses a DigQuad running WLED, with two channels used for the LED strips and one for the button’s built-in light.
All-in, this was probably a month of evenings for design and electronics work, and a month to get printed and assembled. With two weeks to go until the big switch-on, it had a few days in the garden to check robustness against the elements, including an intense soaking from the hose.

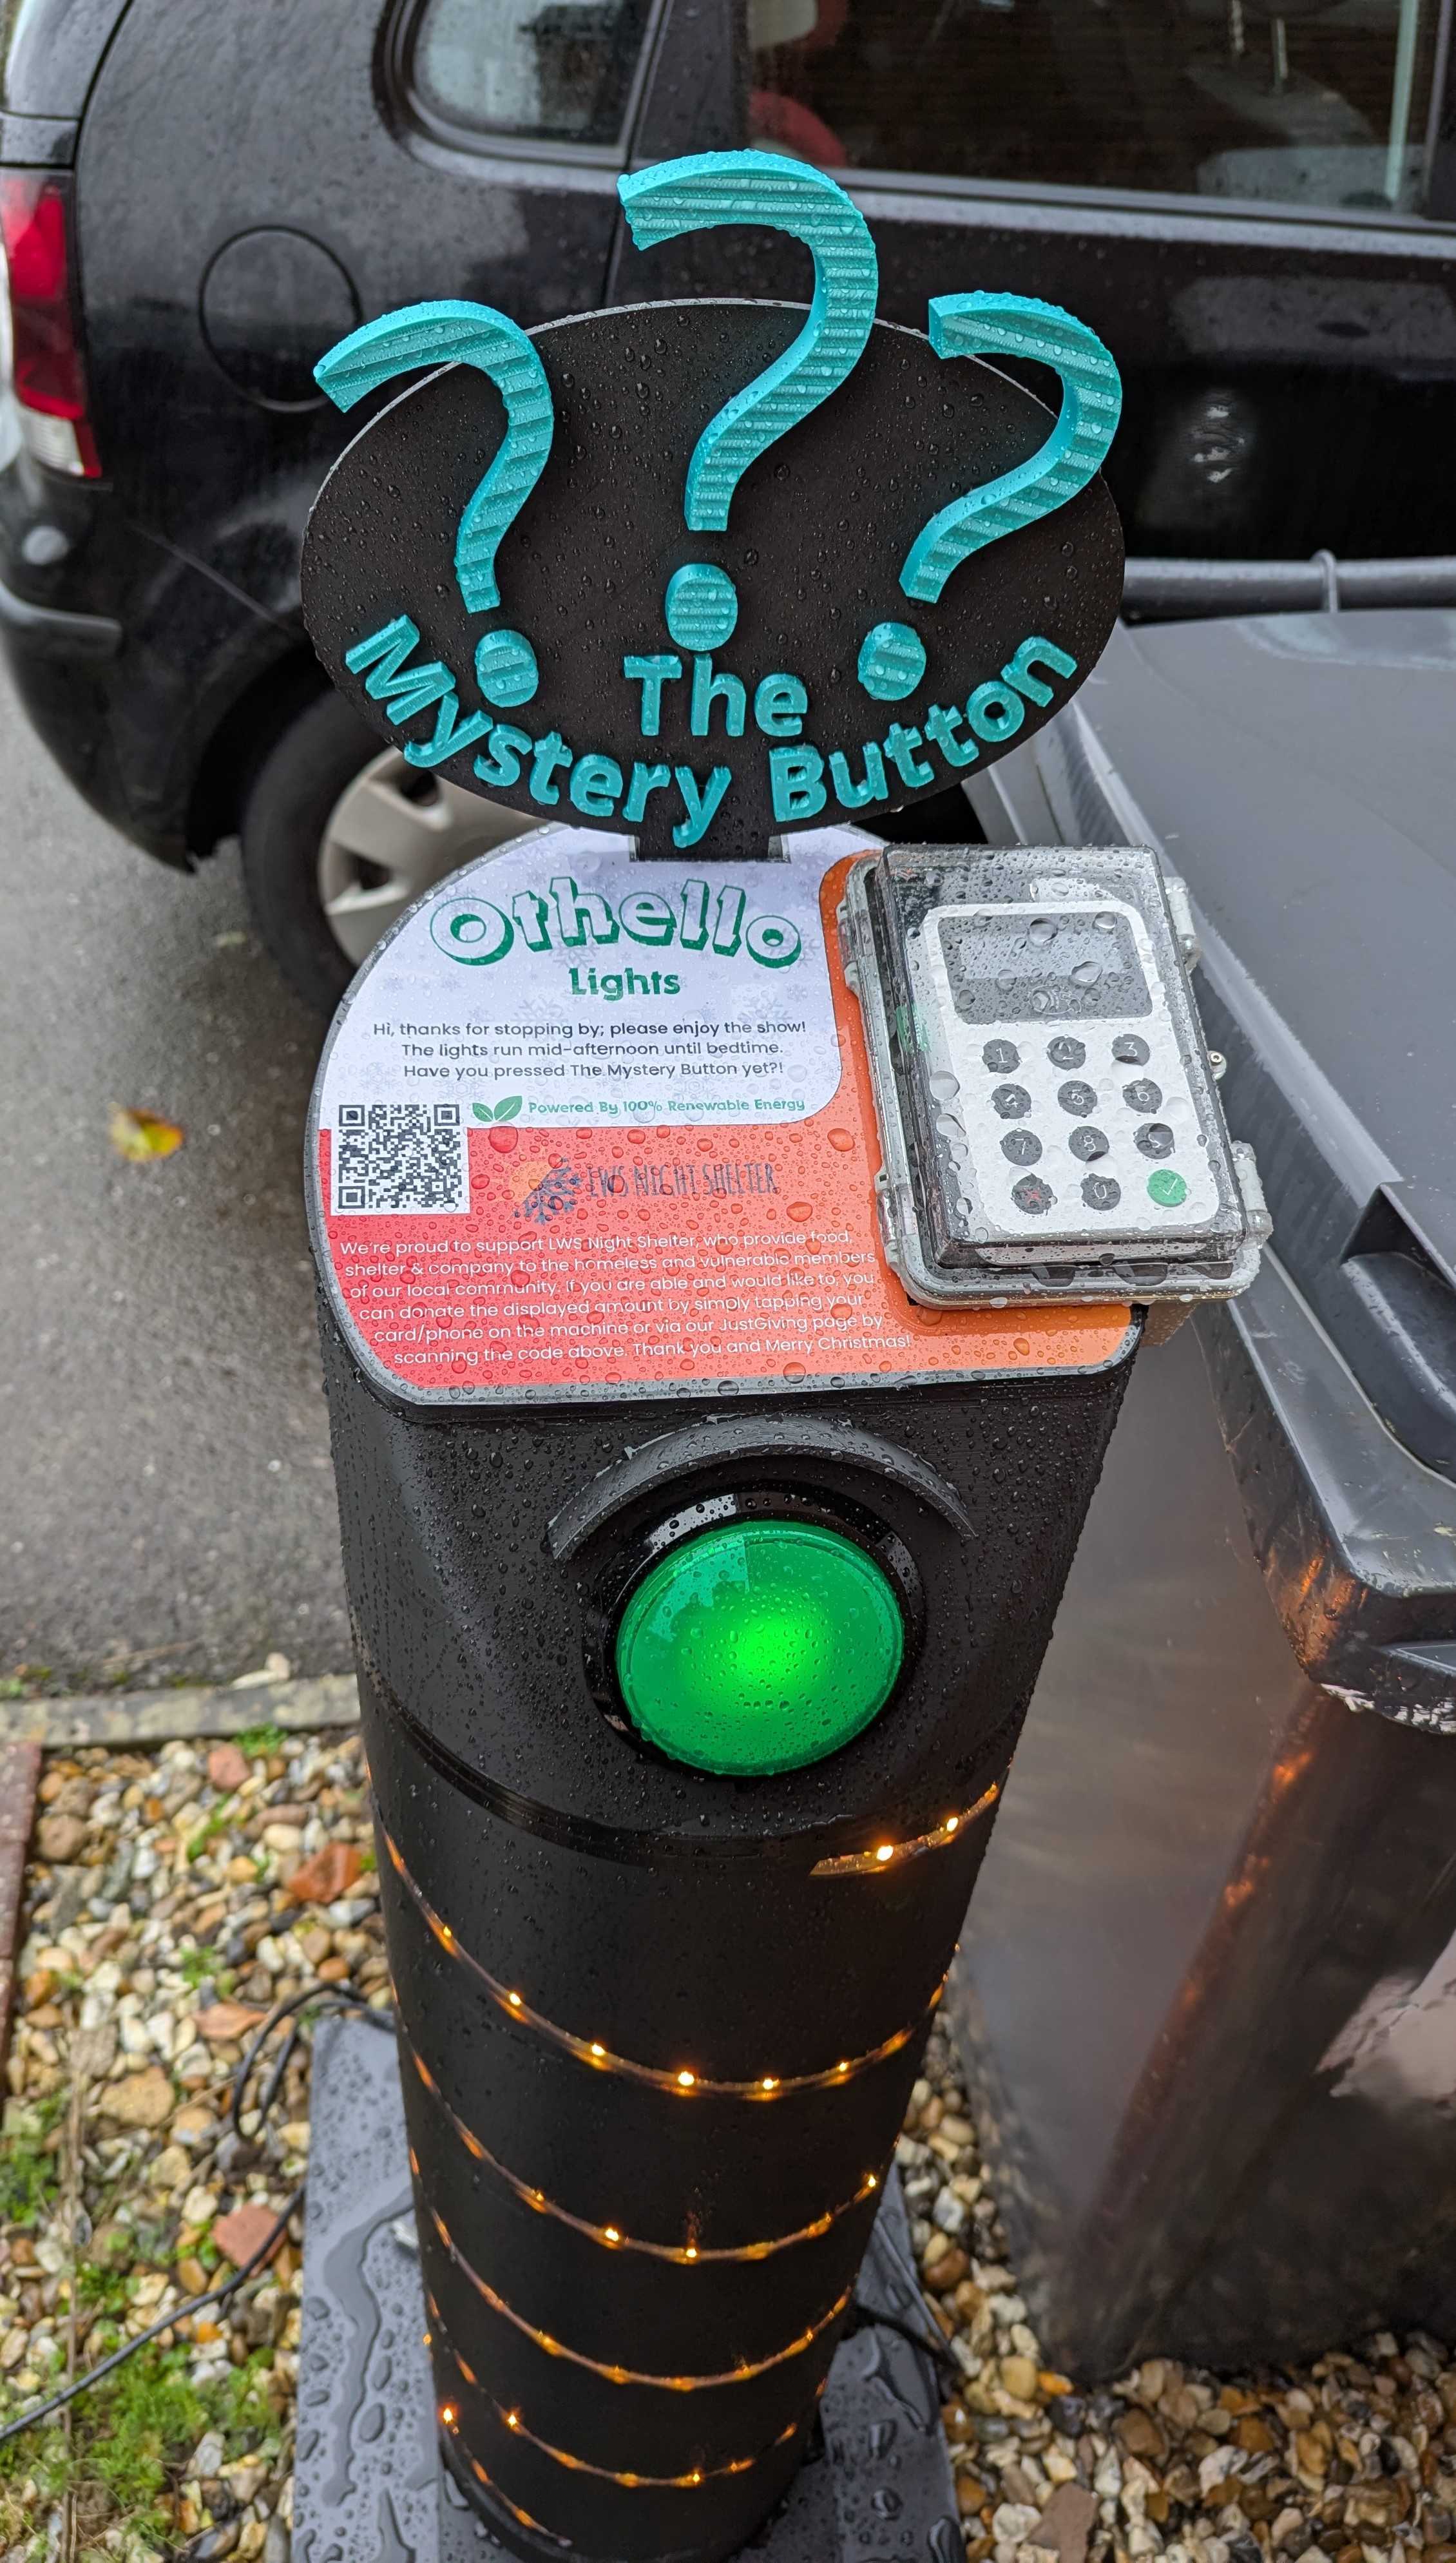
I’m not sure what we’re going to do with the pole next year, but one thought is to make it better lit at the top – the graphics are difficult to read in the dark, and the ??? motif isn’t very visible from the pavement or the other side of the road where people tend to watch from.
The Windows
In previous years, the upstairs windows used Twinkly Strings, which produced a classic fuzzy fairy light look that’s fine for abstract patterns, but not for precise graphics. They also take hours to string up, take down and map into xLights. Every year I’m keen to reduce setup & takedown time – as this would otherwise just keep going up as more stuff is added to the display.
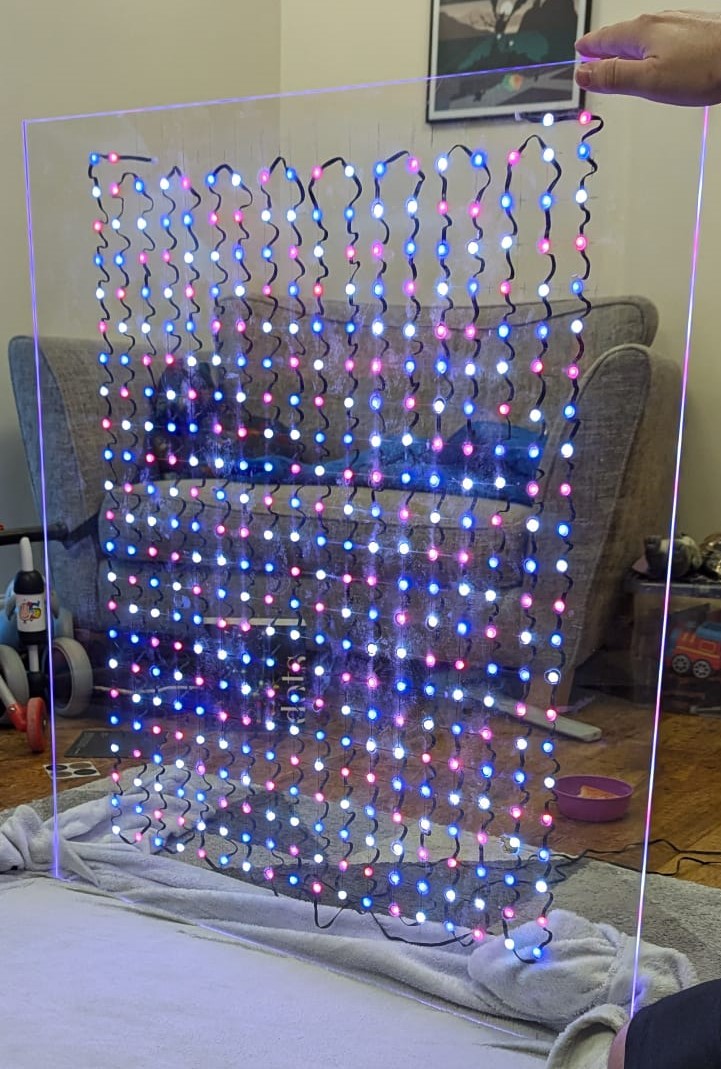
So this year, we replaced the Strings with Twinkly Dots, whose LEDs are positioning on the wire. This means it’s easy to create the straight lines required to setup a perfect grid. After some experiments, we super-glued all 1800 LEDs down onto perspex sheets. Each window’s grid has the same dimensions – 9 wide x 22 high, which means graphics can move across them consistently. The centre window is double-width, which makes a great focus point for the item carousel.
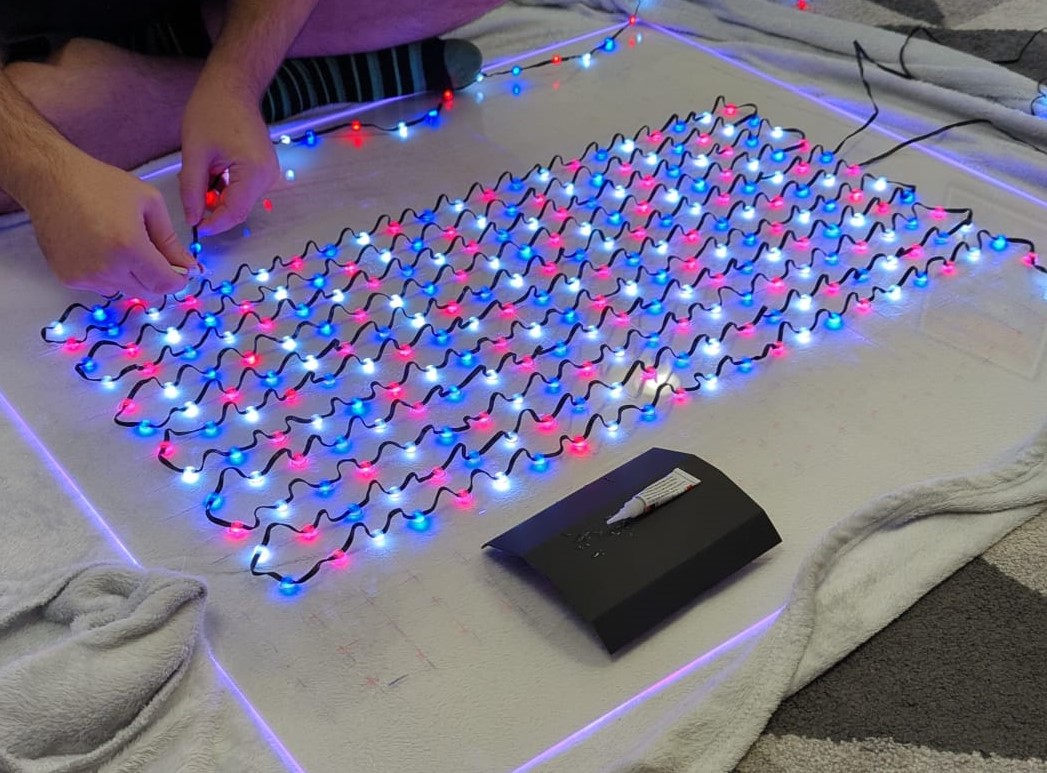
Each sheet took 2-3 hours to layout, and glue lights on to. Being permanently attached to the perspex means they now only take seconds to put up and down. I also designed and printed stands that hold the sheets upright and at the correct height in the window.
The Strings that these replaced got reused elsewhere – one set got added to the Big Tree, bumping the LED count there to 850. Two more were added as part of the button pole “fuze”, and the fourth was added to a section of guttering. The latter three I created some faux Clusters, by folding the 24m string lengthways and cable-tying it to create a 6m length with higher density and a Clusters appearance.
The Card Machine
I settled on a Zettle Reader 2 for contactless payments because:
- it supports transaction notifications, and handily I discovered Announce Zettle; a plugin for Zettle + FPP that could trigger a display command on payment.
- it supports repeat payments (as a Beta feature) – this allows me to setup a fixed price transaction that’s always present on the reader; there’s no need for me to press a button on the iPad to setup a new transaction after every donation.
The card machine has been a great success – just over 50% of donations have come from it. The “Thank You” sequence has been well received by the donors that spot it – unfortunately a lot of people don’t happen to look up at the lights after tapping their card – they’re either still looking at the card machine, or putting a card back in their purse. It’s likely we’ll keep the machine next year, and I’ll find a way to add some messaging onto the pole itself, eg a little text display.
During testing, I discovered that multiple notifications will sometimes arrive for the same transaction, causing the sequence to trigger multiple times, and my transaction log to over-count donations. I worked with the Announce Zettle author to patch the plugin with a fix that deduplicates notifications based on their transaction id.
The Mystery Button
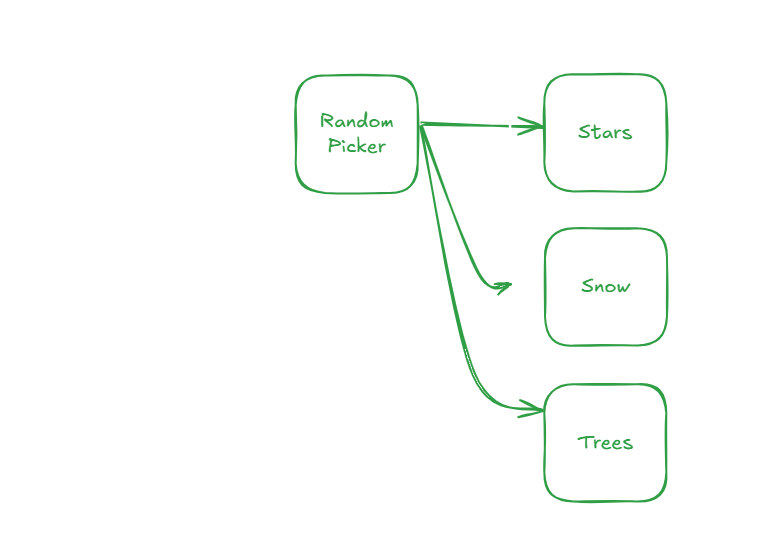
Logic for the Mystery Button is handled by our Home Assistant integration. Button presses trigger the Randomiser sequence – a “fuze” of lights that runs down the pole, along the floor and up to the centre window, where a flashing ? animation runs. It also queues a random surprise sequence. Initially I created six of these (Stars, Snow, Trees, Presents, Train, Classic Game), adding a seventh (UFO) a few days later. After the surprise finishes, the display goes back to its looping playlist of abstract patterns, picking up exactly where it left off.
Additional logic prevents the button from retriggering if it’s pressed again (and thus interrupting itself), if the “Thank You” donation sequence is running, or when the display is off. The button’s light is only lit during “valid” times to press it. I’m not sure how many people noticed this; the light isn’t very bright, and we had a lot of presses while it was unlit. As of writing, 1,253 random surprises were triggered, and 1,602 invalid presses!
The Show
A light show isn’t a light show without some sequences! I remastered all of last year’s show to add in new props (such as the button pole, extra reindeer, big star) and upgraded props (the big tree, upstairs windows), but also replaced some sequences (or bits of sequences) that I wasn’t keen on with new content. I’d like to create more new stuff for next year, but this year I ran out of time with everything else that needed pulling together. When people see me putting lights up on 6th November and say “it’s a bit early for Christmas isn’t it?!”, I reply “actually, I’m running late!”.
Along the way I also contributed back some code fixes to xLights – including a UX bug when adding new Twinkly devices that was quite irritating, and a performance improvement to the rendering of Bars effects, which was affecting me quite a bit.
It often surprises me how the time it takes to create a sequence, doesn’t correspond to how “good” it is. For example, this one called “Diamonds” is my new favourite one – it took about an hour to make, vs some of the others that are 2-3 evenings.
2025
For 2025 I want to make some tweaks to the button pole to light it better, and maybe give the top a new layout so it doesn’t look like you need to pay £3 to press the button – we ended up putting little labels on the button “Free to press” and the card machine “Donations >>>” to make it clearer that they’re unrelated, as some people were confused or thought it was outrageous to pay that much for a press (and I agree – it would be! Which is why it isn’t…)
We also need to have a think about the hedge – this is the second year of the Twinkly Festoon lights, and they’ve not done well in the British winter. By the end of 2023’s season, 2-3 bulbs were showing faults (eg they’re stuck on red) or have simply failed, and more are showing problems as we near the end of this season. They were useful last year for showing text, but with the new matrices in the windows, it’s not necessary any more.
We still had trouble with WiFi this year; on at least two occasions the spectrum suddenly became very congested, and I had to manually shuffle channels around and wait for it to settle it down again. It’s frustrating when this happens as you feel quite powerless while the display looks obviously broken (bits stuttering, out-of-sync etc) for hours. I’m not sure what to do about this yet, but I’m contemplating switching some products to Twinkly Plus or Pro so I can get them wired rather than wireless.
Anyway, until next holidays, we’ll leave you with some more snippets of 2024. I’ve got a full drone video awaiting editing too, which will come later. Subscribe to the EdMadeSomething channel to find out when this drops!
Ingredients
Adding to 2023’s list…

Leave a comment