
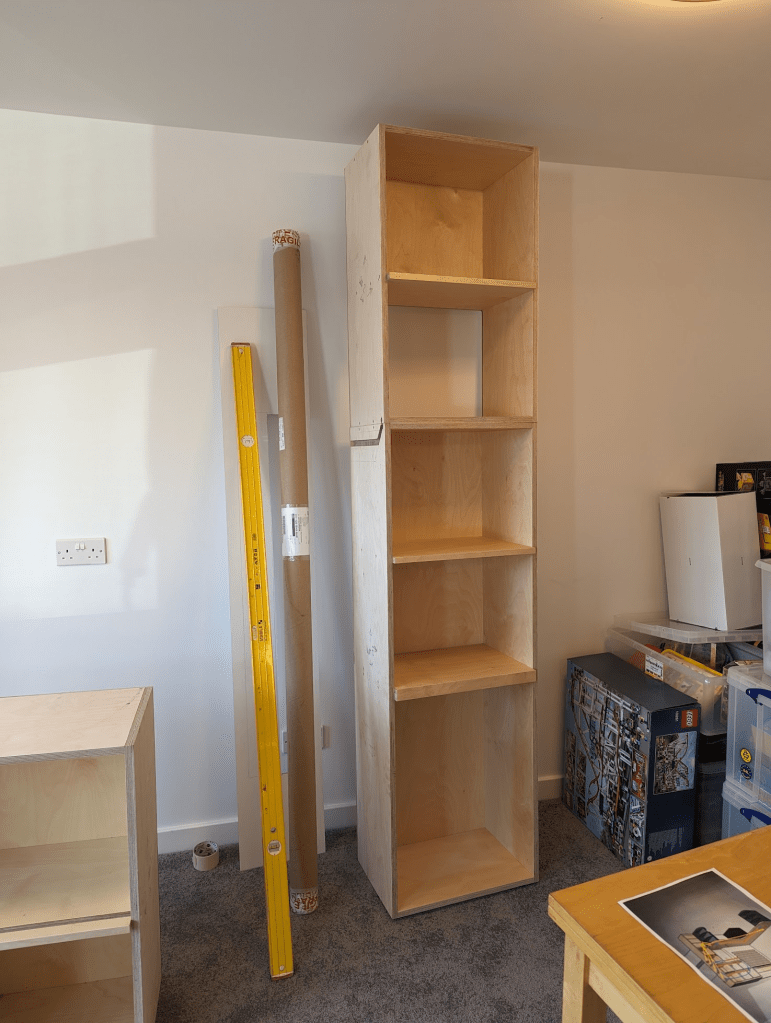
Taking place many months after the original, this is part 3 in my LED Games Storage Unit series (Part 1, Part 2), where I basically did the same thing again for an epic workstation on the opposite side of the room.
With Will on-board again for wood-wrangling, we created a design with a few core requirements:
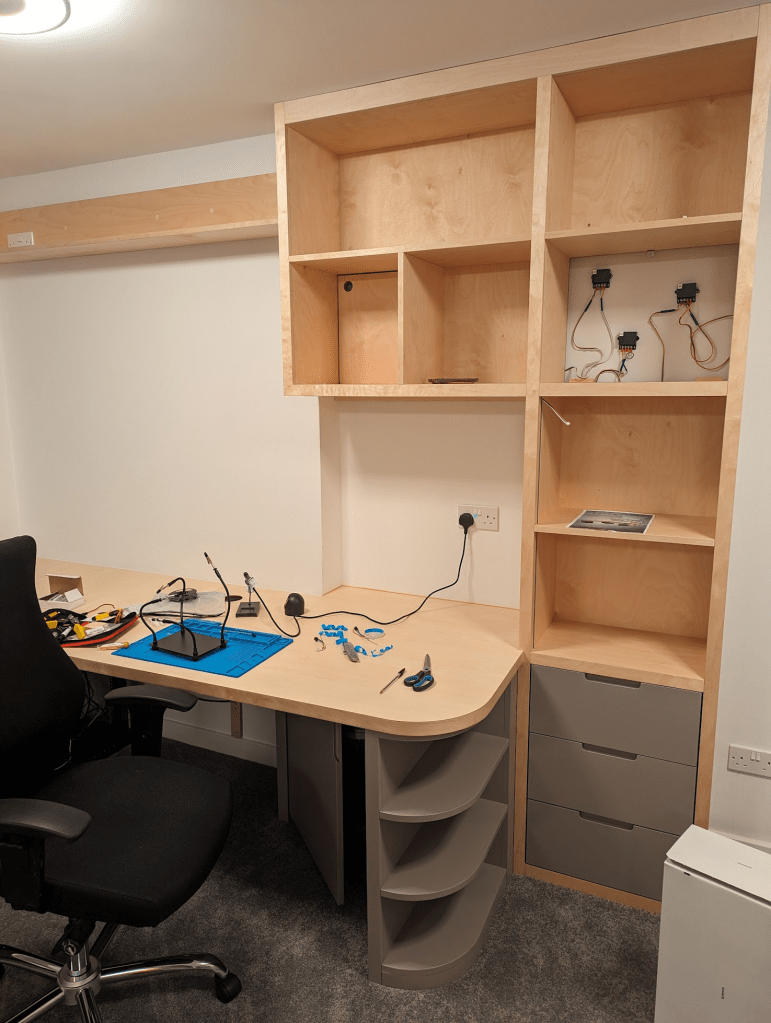
- Enough space underneath to hide my server rack in the corner
- A deep workspace with enough space for a regular computer setup, plus a “project” without having to push the keyboard out the way
- More storage cubbies
- Matching the style of the Storage Unit as closely as possible
- LEDs!
Learning some lessons from before, I thought more about the physicality of actually installing the LED steps and wiring them in – eg avoiding awkward 90 degree transitions (which looked cool, but were the most fragile bits of what I did before).
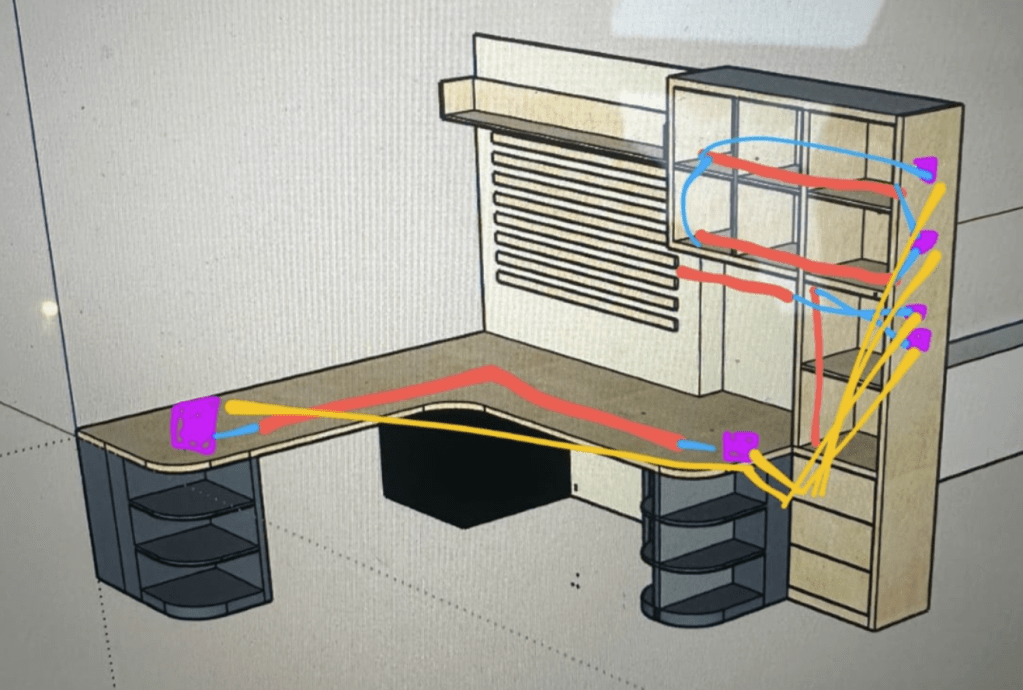
Overall the strip layout is similar with horizontals and verticals in the cubbies, then a couple of extra useful features:
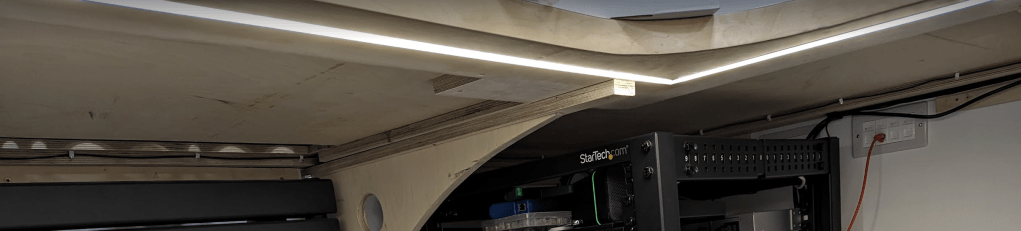
- A long strip underneath the desk surface that can serve as a torch for when I’m under there fiddling with the rack
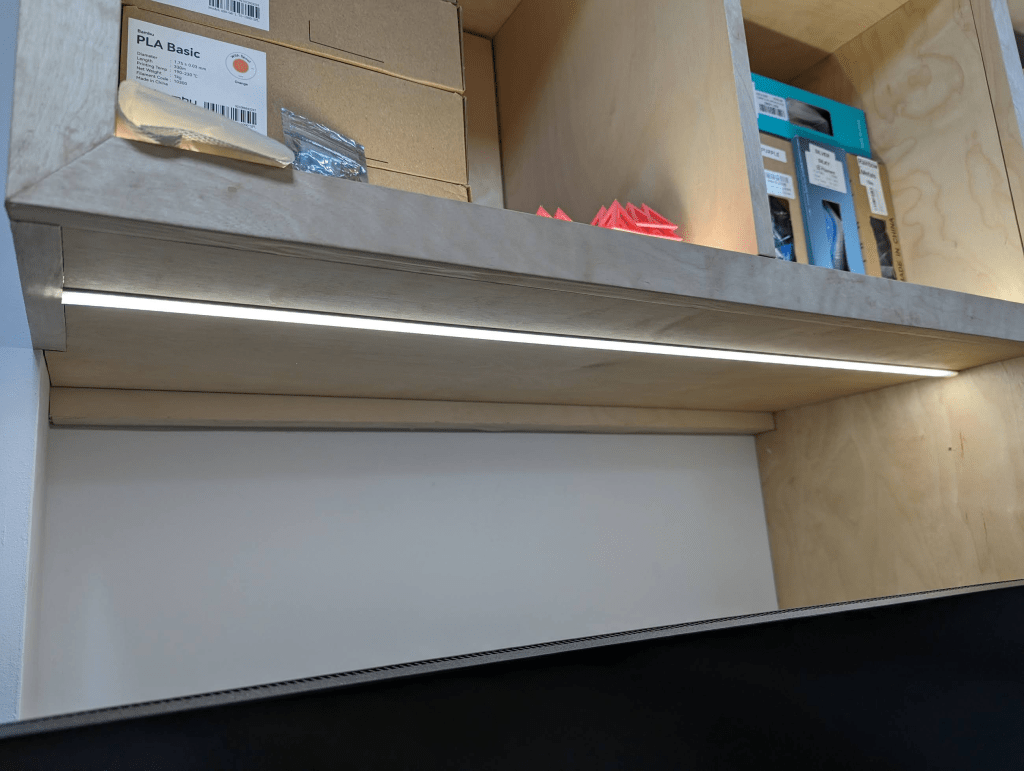
- A strip that doubles as a task light
The length of the long strip (~3.5m) was going to cause complications with power injection – having to add more power somewhere in the middle, routing wires through from the back of the surface to the front, and adding an extra buck converter in an awkward place. To mitigate this and simplify, I decided to compromise on strip density. Dropping down to 60/m (which I happened to have spare from earlier experiments) halves the power requirements so I would just need to inject at the ends. There is more visible spotting and reduced brightness because of the reduced density but as it’s facing down and close to the floor, you don’t notice.
A strip above the main work area means that I don’t need an additional lamp etc hanging around
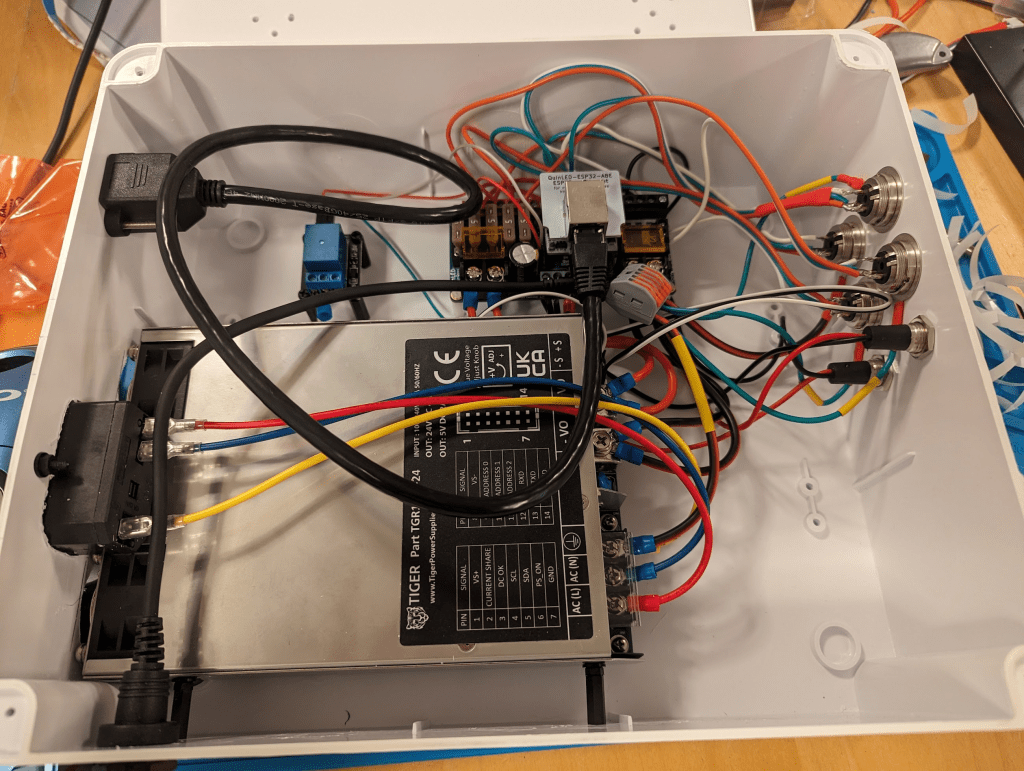
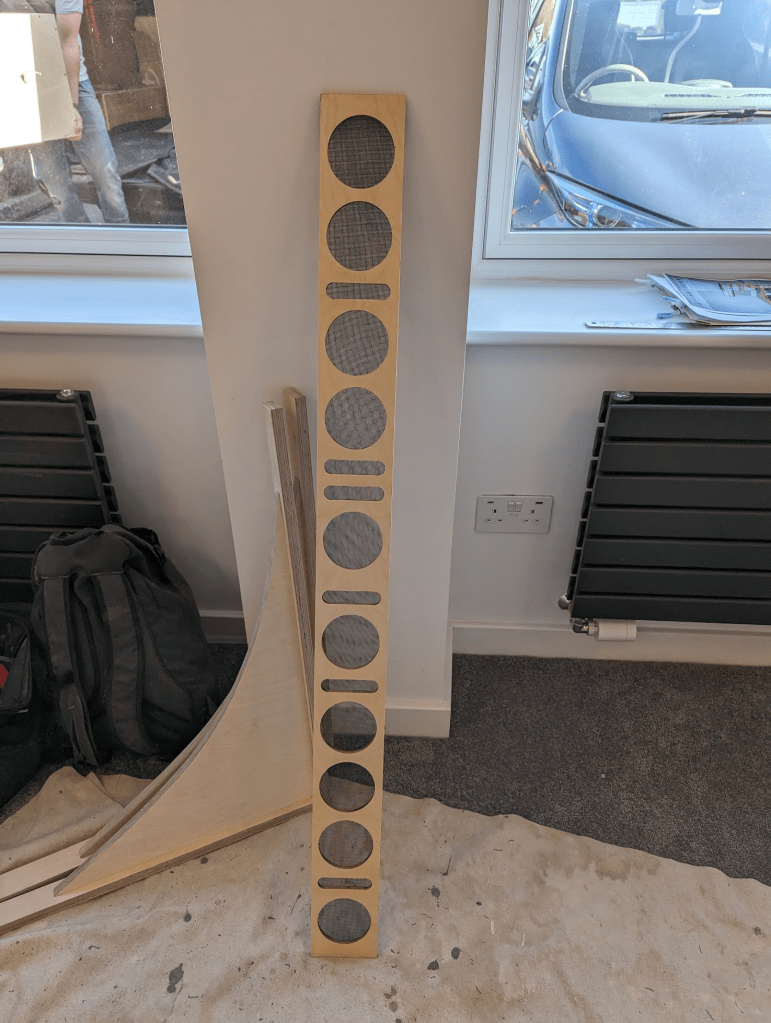
This is pretty much a copy of the Storage Unit’s, except I used a smaller control board – the QuinLED DigQuad is intended for 4 strips, so is perfect for this project. I used the same power supply as before (quite over-spec’d, but it has the nice 5v aux output feature that I found useful). The layout is a bit different to before – in both projects I tailored the position of input/outputs based on the intended orientation of the box in its cupboard. It turns out in a matter of months I’d forgotten a lot of how I actually built this thing, and missed a couple of tricks from before.
#whoops – There were a couple of things that didn’t go to plan – notably at the Big Switch On. Just as the show started, FPP crashed and I had to turn everything off and on again, making sure to bring stuff back up in the right order while stood on the drive with an audience of family & friends – no pressure! I later filled a bug, and the FPP authors had got it fixed by the next day.
One improvement I did make is the earthing rings on the 3-pin sockets. On the Storage Unit’s control box I was soldering earth wires directly to the socket casings, which was pretty tedious. I later discovered that you can buy rings to fit these sockets specifically for that purpose, so I grabbed a few for this second iteration – much easier!
As I did most of the work after Will was finished, it was nice having a proper space to build stuff – there was some irony before that this room is intended to be the place for me to do projects, but that my biggest/most complicated project had to be done on the dining room table while the room was being built. We refined the wiring process a bit – making the channels diagonal from the start meant the wires could (mostly) freely move back & forth, so I could be generous with how much length I gave them and not end up in “stuck wire hell” again from last time. I didn’t have to extend a single power injector this time 🥳.
Will’s assistant surprised me with this nerdy radiator cover – I’ll leave it as an exercise for the reader to figure out what it is!
The buck converters I’ve use don both of these projects have got these terminals that are fully exposed. Although they’re hidden behind the units’ removable backs, I’m still slightly worried about a curious child poking them. So I designed and printed some covers for them that ensures you can’t trivially them with a screwdriver. They ended up being such a tight fit that I’m not sure I’ll actually be able to remove them. Getting more comfortable with OnShape meant I did this in about an hour; it’s so easy to measure something with callipers and bang out something that snugly fits!


Automation
As before, I wanted to automate these lights so that they form part of the room’s general lighting. To match them with the Storage Unit I copied across all of the presets and then simply told Home Assistant to turn them both on together – job done. Almost. On video calls, people often ask if I find the lights behind me distracting – and I always say the same thing – they’re not, because they’re behind me! However, the ones in front of me definitely are – the first time I sat down to try and work at the desk I discovered (shocked Pikachu face) that the constant moving light around the back of my monitor and in my peripheral vision was incredibly distracting.
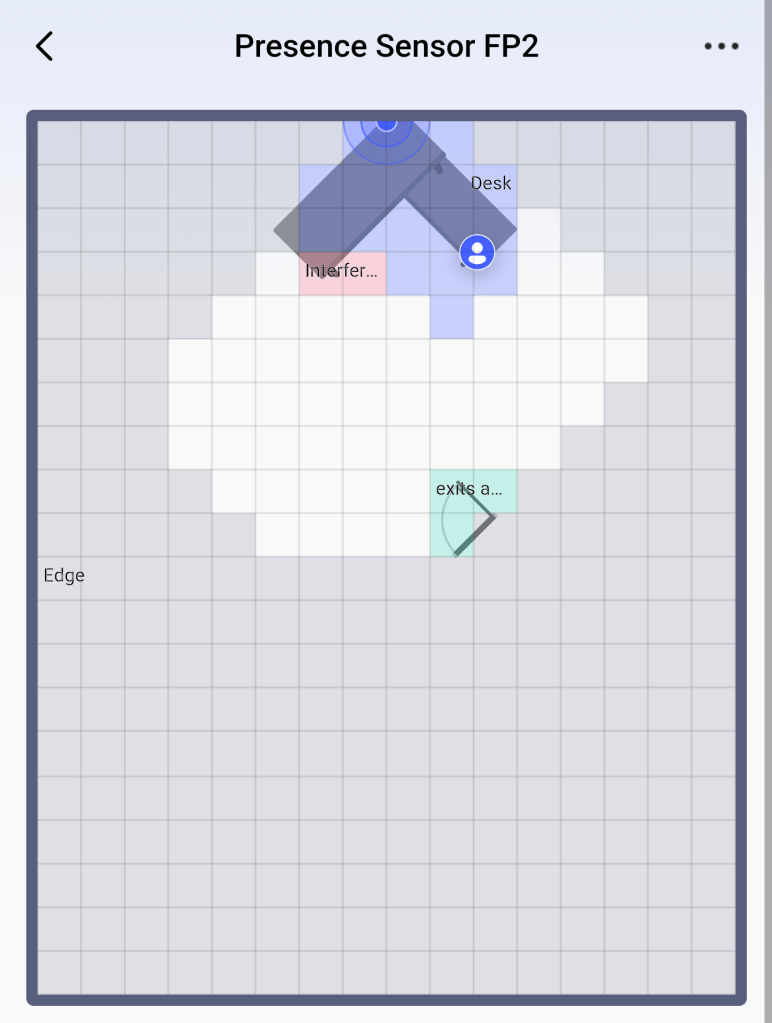
To fix this, I used the room’s presence sensor to detect when someone was sat at the desk and switch its lighting preset to a plain white. If I stand up and walk away, it returns to the main preset and matches the Storage Unit again after a few seconds. I had to do quite a bit of fine-tuning on this, adjusting the desk “zone” and adding hysteresis to the state switch to give me a bit of a grace period – at one point, it could detect the difference between me leaning forward, and leaning back in my chair.
In the end
This workstation project was much quicker than the storage unit was, due to the shorter strips reduced power requirements, a couple of process improvements that reduced snags and physically-tricky tasks, being a smaller project (only 6 power injectors vs 16 in the original), and vaguely knowing what I was doing, meant it was around 3 evenings of work rather than 3 weeks.
Ingredients
These were the same as listed in Part 2, and also:
LEDs
- BTF-Lighting’s SK6812 RGBW Natural White LED Strips, 60 pixels/metre [Link]
Control Box
Buck Converter Covers
- Bambu P1S [Link]
- Buck Converter Cover [OnShape, Thingiverse]
- BambuLabs PLA Basic Black [Link]
- Callipers [Link]
Ed

Leave a comment